Balusters are not just decorative elements; they are much more than that. They are essential when it comes to determining the structure and safety of your stairways. As time passes by, your stairway may fall outdated and you may want to update your stairway’s look. In such circumstances, there are two options: switching to a modern style or replacing damaged balusters. However, the reinstallation and removal process may cause cracks, removal, or, in some cases, even permanent damage to your stairs if you are not careful during the entire process.
By following the right steps and with more patience, you can manage a staircase baluster installation project. Here’s a step-by-step guide to help you get the job done properly. For professional services, explore Vintage Wood Floors and Stairways’ baluster and spindle work.
In this blog, we are going to see how to remove and reinstall balusters without damaging your stairs.
Step 1: Inspect Your Current Stairway Setup
Before you start the process, you should first check how the balusters are attached. Some of it may be tightened with screws, wooden dowels, or nails, while the rest will just be glued to its place. It is important for you to understand what type of installation you are going to proceed with and choose the right tools so that you can easily avoid force that could unnecessarily damage your stair treads or handrail.
Step 2: Gather the Right Tools
It is important to have the right tools that will ensure a damage-free and smooth process. The tools that are commonly used are
• Drill or screwdriver
• Small pry bar or pliers
• Rubber mallet
• Wood glue or construction adhesive
• Measuring tape and level
When you are prepared, it will help you to prevent mistakes that are unnecessary mistakes and will also keep the job going efficiently.
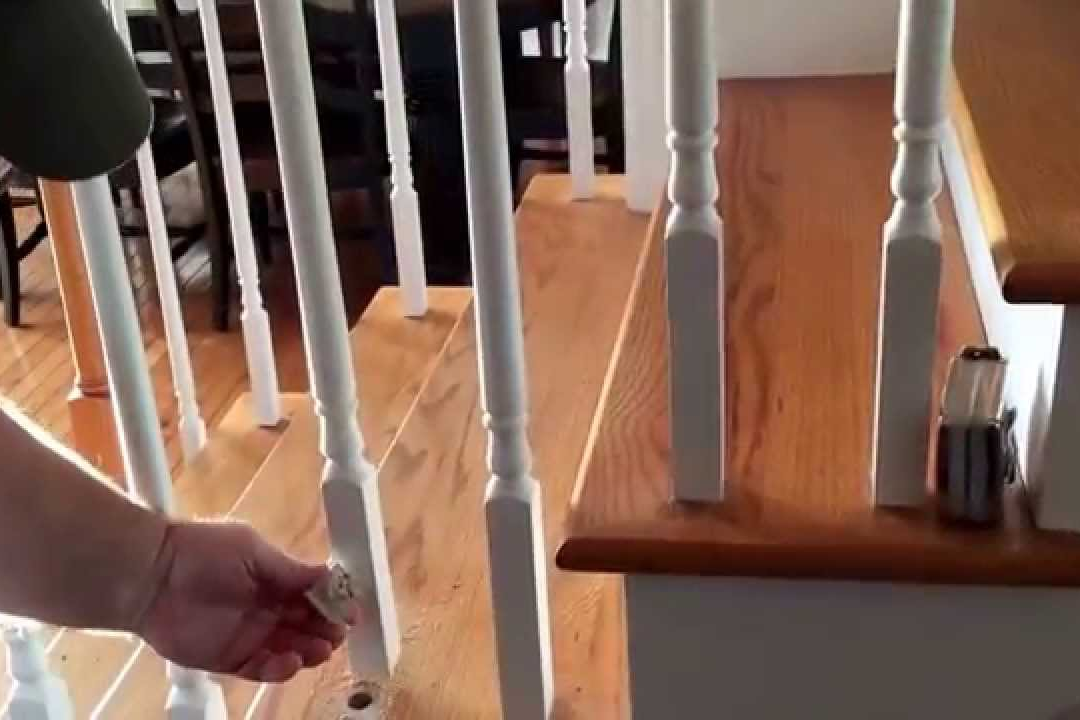
Step 3: Remove the Old Balusters
You have to start by first loosening nails or screws that are holding the balusters in place. You should twist gently and wiggle the baluster until it loosens. In case of adhesive being used, you should not forcefully remove it because it will crack the surrounding wood. For certain stairways that have thin wood strips attached to the balusters with fillet strips, before removing the baluster, you should carefully pry them off.
You should slowly work this way and repeat this exact procedure for all the balusters until your stairway is clear
Step 4: Prepare for Reinstallation
You should clean the old holes in the handrail and tread and remove the glue or debris that is left over. To make your new balusters or refinished originals fit perfectly, you should take measurements perfectly. Before you install, permanently dry-fit each one because this will allow you to ensure that the alignment, spacing, and overall appearance are perfect before you commit.
Step 5: Install the New Balusters
Insert the baluster first into the handrail and then into the tread, and apply a small amount of wood glue into the base and top holes. To make it stand vertically perfectly, you should use a level to ensure that. If it requires nails or screws, you should carefully secure it without overtightening. Keep continuing the process and keep even spacing between them for a much more polished and balanced look.
Step 6: Finishing Touches
Once you have finished installing all the balusters, you should wipe away any glue that is excess glue and allow it to dry. You can reattach fillet strips if the design you have chosen requires them, and you can finish it with a seamless appearance by touching up with satin or paint. Finally, the last step would be to check the stability of each baluster. This will ensure that your stairway is stylish and also safe.
When to Call a Professional
While many homeowners enjoy DIY projects, professional expertise can save time and prevent costly mistakes. Experts in staircase baluster installation, like the team at Vintage Wood Floors and Stairways, have the skill and craftsmanship to ensure your stairway looks flawless and remains structurally sound.